
HOW TO INSTALL BARISTA BASICS RINSERS
1. Remove unit from box, flip pan upside down and confirm the drain and spray assembly are tightly secured to pan to prevent leaks.
2. Using a flat blade screwdriver, confirm the interior spray assembly is tight by turning the screw counterclockwise while holding onto the sprayhead. Snug is fine.
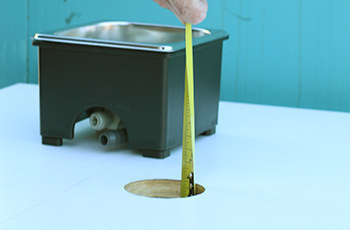
3. Layout centerline and hole placement. Double check measurements before drilling/cutting holes/openings in counter top. Recommended hole size is 2.5” - 3” minimum.
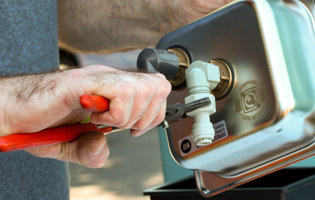
4. Dry fit all fitting placement so elbow fittings are orientated in the proper position when tightened.
5. Install needed fittings to drain and spray assembly. Use thread sealant when/where needed.
6. Secure pan to countertop with your sealer of choice, caulk, silicone, velcro.
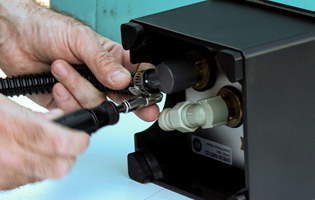
7. Cut water line to needed length and install at pan. Next, install at elbow fitting. Then install from other side of elbow to your supply. Secure water line with fitting clips at all connection points.

8. Cut drain line to needed length and install at pan. Next, install at elbow fitting. Then install from the other side of the elbow fitting to the drain source per local plumbing code (drain bell, etc.) Tighten hose clamp(s).
9. Pressurize water line and check for leaks.
10. Confirm the drain line is routed properly and draining properly. Drain lines need a “downhill run” with no traps or obstructions. Gravity is your drain line's best friend.
11. Time to Test! Press down on the star with a pitcher rinser or a glass to ensure everything is running properly! Remember: Don’t twist the black star as you are rinsing or you will unscrew the fitting.
To keep your rinser running at its best, we recommend performing maintenance every year, or more for high volume cafes, with our rinser maintenance kit. Learn more about rinser maintenance here.


