

Barista training should cover espresso preparation, milk steaming, drink recipes, cleaning, and the daily routine of working behind the bar. Start with a repeatable process for each task, then give new team members time to practice before they take on a full queue of orders.
This guide focuses on the skills and supplies that make those first training shifts more useful. The same fundamentals can help home baristas build a more consistent routine, too.
What Tools Do You Need for Barista Training?
A basic barista training station needs an espresso machine, an espresso grinder, a scale, a correctly sized tamper, milk pitchers, a thermometer, and cleaning supplies. Before buying anything, check what is already on your bar and which tools fit your equipment.
| Task | Tool | What to check before buying |
|---|---|---|
| Measure coffee dose and espresso yield | Coffee scale and timer | Readability to 0.1 gram, room for your portafilter or dosing cup, and clearance between the scale the spouts |
| Tamp evenly | Espresso tamper and tamping mat | Tamper diameter must suit the basket; choose a mat that works with your counter layout |
| Practice milk texture and temperature | Milk pitcher and thermometer | Pitcher size should suit the amount of milk needed for the drink |
| Clean the groups | Espresso machine cleaner and group brush | Cleaner approval for your machine; a compatible blind basket or insert is separate if needed |
| Remove grinder oils and retained grounds | Urnex Grindz | Confirm your grinder manufacturer permits cleaning tablets |
Getting a training station ready? Start with the tools you are missing. Match the tamper to your basket, the pitcher to your drinks, and the cleaner to your machine.
What Does a Barista's Day Look Like?
Barista’s have many responsibilities throughout their workday. Below we’ve compiled everything a barista needs to know, from making coffee to cleaning at the end of the day. Not every cafe is exactly the same but here are the basics to get you started.
How Should a Barista Set Up Before Service?
Before service, a barista should check equipment readiness, prepare a clean station, and dial in the coffee to the cafe’s recipe.
Have your trainer go through the opening routine, then ask the trainee to repeat it. Confirm that the espresso machine has warmed up according to its manual, the grinder is clean and ready, and the scale is charged or has working batteries. Set out clean pitchers, cups, and the tools needed for service.
At the beginning of your day when setting up your machine, it is necessary to run shots through each portafilter. These shots are called "seasoning shots." This is done to ensure that any debris, cleaning detergent, etc. that may have settled overnight in your machine is flushed out prior to making your first customer's drink. At this time you will also be able to see where your grind is and make adjustments accordingly.
Keep the current espresso recipe where everyone can see it. Include the coffee, dose, target yield, and the timing method your team uses. Taste a test shot before serving customers, and record any adjustments so the next barista has a clear starting point.

How Do You Train a Barista to Make Espresso?
Know your recipe and variables: Just like with baking or making cocktails, making awesome espresso requires knowing how much of each ingredient you need and the variables you can control to ensure your desired shot. Luckily espresso only has two ingredients: finely ground coffee and water. When it comes to espresso, the more precisely you measure your ingredients the more consistent your shots will be. Whether you are using volumetrics or a scale that can measure within .10 of a gram it is important to understand your goals and which variables will affect your results.
Teach a new barista to measure the dose, prepare the coffee evenly, tamp, and measure the espresso yield and time. Then taste the result together.
Understand Dose, Yield, and Brew Ratio
Dose is the weight of dry ground coffee in the portafilter basket. Yield is the weight of liquid espresso in the cup. Brew ratio compares those two weights.
For example, 18 grams of coffee producing 36 grams of espresso is a 1:2 brew ratio. That is a useful practice recipe when appropriate for the basket and coffee, rather than a requirement for every espresso.
Use your roaster’s recommended recipe when available, and choose a dose that suits the basket.
The Nitty Gritty of the Variables
Grind
Your grinder is where good espresso preparation begins. A high quality grinder with big sharp burrs will produce more even and consistent little coffee particles to extract all the good coffee flavors from. A barista can adjust the size of particles the grinder producers by tightening or loosening the grind. Tightening makes the grind finer and loosening makes the grind courser.
Dose
Your dose is the amount of coffee you place in your portafilter. It is the coffee part of your recipe. Your range of dose is dictated by the size of basket you are using. Whether it is a 7gr single basket, a 14-18gr double, or a 18-22gr the dose you use should fit within the range the basket was built for. You can train yourself to be pretty consistent eyeballing your dose or you can use a scale and measure within a tenth of a gram. Either way, if you have an inconsistent dose, your shots will vary drastically.
Distribution
Once the coffee is in the portafilter basket, often it is necessary to move the ground around a bit to create an even bed of coffee. There are many ways you can choose to distribute coffee within the portafilter basket. Some baristas use their finger or a fancy distribution tool and others just tap the edges of the portafilter to move the grounds around in the basket. The goal here is to be as even as possible before tamping.
Tamping
This is the process of compacting the coffee grounds into the portafilter. Tamping serves two purposes; one is to create headspace between the grouphead and the coffee, the other is to evenly pack the coffee ground to their maximum density.
Extracting
Description of measure volume or brew weight as well as time. Leave the specific quality standards open for different interpretation (crema, volume, time etc.)
Practice the Same Preparation Sequence
- Start with a clean, dry basket.
- Weigh the ground coffee in the portafilter to the recipe’s dose.
- Distribute the grounds evenly before tamping.
- Support the portafilter and tamp level.
- Brew, measuring the yield and recording the time.
- Taste, discuss, and make one deliberate adjustment at a time.
For a closer look at hand position and technique, use our tamping tutorial.
Learn What to Adjust
When dose and target yield stay the same, a finer grind generally slows the shot, and a coarser grind generally speeds it up. Uneven preparation can also affect flow, so check the routine before chasing every variation with the grinder.
Use the recipe and taste together. A shot timer is a useful reference, but a time alone does not tell you whether the espresso tastes right.
Need a scale for training? Compare coffee scales and timers, and check that the model fits your portafilter, cup, and drip tray.
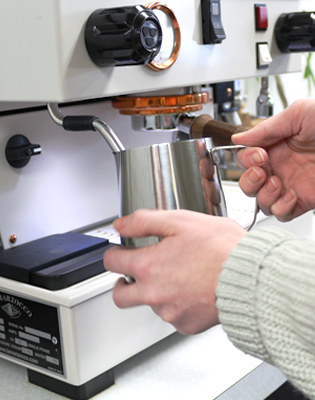
How Do You Steam Milk for Lattes and Cappuccinos?
There are two phases to steaming milk:
- "Stretching" - Introducing air to texture the milk.
- "Steaming" - Heated the milk to bring out its caramelized sugars.
Properly textured and steamed milk will enhance the flavor, bringing out the sweetness in the espresso, and will deliver an almost desert like quality.
The General Steps to Steaming Milk
- Measure the milk needed, leaving room for expansion. Make sure you leave room or you may run into a hot, milky problem.
- Purge the wand into the drip tray, keeping hands clear and making sure you aren't pointing the wand toward you.
- Place the tip just below the surface of the milk in the pitcher and introduce air with small adjustments.
- Submerge the tip slightly farther to maintain a rolling motion without continuing to add large bubbles.
- Monitor temperature with a thermometer, following your cafe’s target and the milk manufacturer’s guidance.
- Turn off the steam before removing the pitcher. Wipe the wand immediately with its dedicated damp cloth, then purge it.
- Swirl the milk to keep the texture integrated -- you may need to lightly tap the pitcher on the counter.
- Pour promptly into the cup, mixing with the fresh espresso.
Practice with each milk on your menu; dairy and plant-based milks behave differently.
Practice temperature and texture together. The 12-ounce Milk Steaming Pitcher & Thermometer Combo pairs a pitcher with a clip-on thermometer for smaller drinks. Need more capacity? Compare steaming pitchers for your menu.
Milk Steaming Tips
Always start with cold milk.
Learn to pour only the amount of milk needed for the drink you are making in the most appropriately sized steaming pitcher. Keep in mind when pouring your milk that the amount you pour can expand to as much as double the original volume with steaming.
Purge the steam wand after every use.
Bang out any bubbles by hitting the pitcher on the counter, swirl the steamed milk to prevent separation from beginning to occur.
Things to avoid while steaming:
- Bobbing the pitcher up and down
- Moving pitcher in circular motion
- Setting pitcher down while steaming
Your goal is to create fine, velvety, small-celled, textured, foamed milk.
How Should Baristas Learn Drink Recipes and Workflow?
Baristas should practice the cafe’s actual drink recipes and station routine before working independently. Give trainees a recipe reference with cup sizes, espresso quantities, milk amounts, and any syrups or other ingredients.
Include the less glamorous tasks: returning tools to their place, restocking cups, emptying the knock box, and leaving a usable station for the next person. Those habits matter when orders start stacking up.

How Should Baristas Clean the Espresso Machine and Grinder?
Baristas should clean throughout service and complete a thorough cleaning checklist at the end of business hours. Make cleaning part of training from the first shift.
Clean the Espresso Machine
Remove spent coffee and keep baskets, portafilters, groups, and the drip tray clean. Backflush each group following the manufacturer’s instructions with a compatible blind basket or insert and the specified cleaner dose.
Rinse thoroughly after detergent cleaning. Follow the cleaner’s instructions for any final seasoning shots; Espresso Parts cleaner by Puro Caff calls for making and discarding an espresso on each group after rinsing. Keep handles out of detergent soak solutions.
Keep the closing supplies together. The Espresso Machine Cleaning Combo includes cleaner and a group brush. If the station needs more supplies, compare cleaning kits, checking the contents and fit before ordering.
To learn more about backflushing your espresso machine, check out this backflush guide.
Clean the Grinder
Follow the grinder manual for daily cleaning and scheduled deeper cleaning. Before opening the grinder for manual cleaning, disconnect power as directed by the manufacturer. Keep water away from burrs and electrical components, and dry washable removable parts fully before reinstalling them.
It is important to wash the hopper with hot soapy water to prevent espresso bean oils from building up and becoming rancid. Brush out all excess grounds from inside of doser and wipe inside and outside with a dry paper towel nightly.
Where approved, Urnex Grindz can remove oils and retained particles. Follow its directions and purge afterward with coffee. Always check the manufaturer's instructions before cleaning any piece of equipment.
Set professional maintenance dates with your service technician based on the equipment, use, and water conditions.
Get Your Bar Ready for Training
Give new baristas a clear recipe, time to practice, and tools that fit the job. Check your station for missing tampers, pitchers, scales, and cleaning supplies before the next training shift.
Barista Training FAQs
What Should a Beginner Barista Learn First?
A beginner should first learn equipment safety, station setup, and customer service. Build consistent espresso preparation and cleaning habits before adding more complicated drink sequences.
Do You Need a Scale to Make Espresso?
A scale helps you measure the dry coffee dose and liquid espresso yield. It is useful during training and for checking recipes, including on machines with programmed volumetric buttons.
Does Every Espresso Use an 18-Gram Dose?
No. Dose should suit the basket and coffee recipe. An 18-gram dose is an example, not a standard for every machine or basket.
What Size Milk Pitcher Should a Barista Use?
Choose a pitcher that holds the milk needed for the drink with room for expansion. Practice with the pitcher sizes and milks the cafe actually uses during service. 12oz and 20oz pitchers are some of the most popular pitcher sizes.
Updated October 2026


